基于elementUI实现图片预览组件的示例代码
这篇文章主要介绍了基于elementUI实现图片预览组件的示例代码,文中通过示例代码介绍的非常详细,对大家的学习或者工作具有一定的参考学习价值,需要的朋友们下面随着小编来一起学习学习吧
这是一个简单的点击图片预览的组件
顺便记录一下写组件期间踩的vue中scope的坑~

从注册全局组件开始叭!
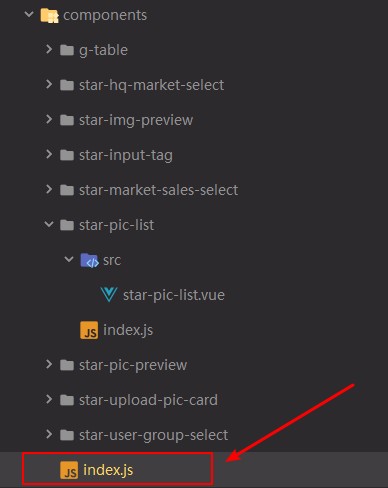
项目目录:
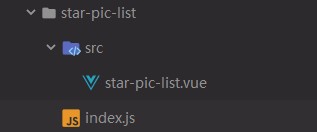
模仿elementUI目录结构,目录名是组件名,src中是组件源文件(或者js服务文件),文件目录下还有一个index.js用于同一管理src中的所有文件,导出并注册,这个组件我们只有一个vue文件件
先看index.js文件里有什么:
1
2
3
4
5
6
7
8
9
10
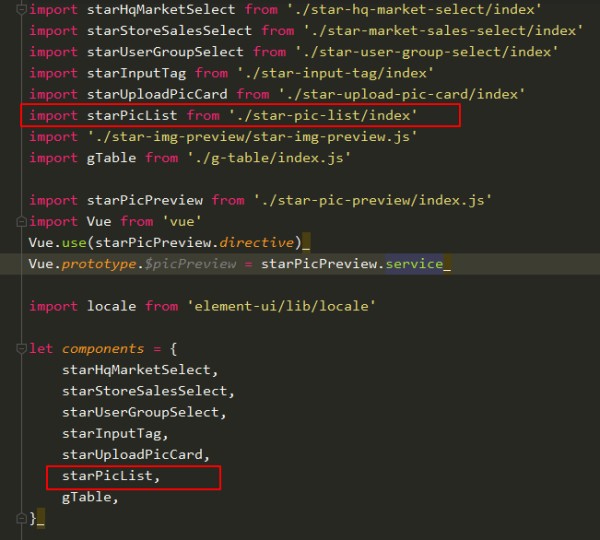
import starPicList from './src/star-pic-list';
starPicList.install = function(Vue) {
Vue.component(starPicList.name, starPicList);
};
export default starPicList;
接下来介绍一下install方法:
Vue.use( plugin ):安装 Vue.js 插件。如果插件是一个对象,必须提供 install 方法。如果插件是一个函数,它会被作为 install 方法。install 方法将被作为 Vue 的参数调用。当 install 方法被同一个插件多次调用,插件将只会被安装一次。Vue.js 的插件应当有一个公开方法 install 。这个方法的第一个参数是 Vue 构造器,第二个参数是一个可选的选项对象:
导出starPicList组件后在管理组件js文件中引用,然后由这个统一管理js文件导出注册到全局即可:
好了,这些是废话!
组件的使用:
1
2
3
4
<template v-slot="scope">
<star-pic-list :data="scope.row.pic" :max-show="2"/>
</template>
参数
data: 传入图片数组;
max-show: 一次最多显示几张图片
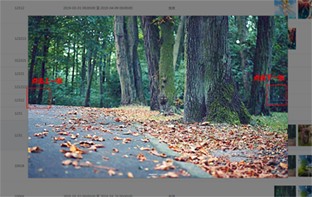
效果如下:

补充:vue组件开发中 style 添加scoped后,修改第三方组件样式没有效果问题:
在vue的开发中,我们通常和element-UI配合开发,就会遇到,在组件style中添加scoped后,element-ui中使用的子组件样式无法改变。
不用scoped,去掉这个属性,但是会污染全局样式,(可配合less 或者 scss(推荐scss),所有样式写在当前组件id或class下面)
组件源码:
1
2
3
4
5
6
7
8
9
10
11
12
13
14
15
16
17
18
19
20
21
22
23
24
25
26
27
28
29
30
31
32
33
34
35
36
37
38
39
40
41
42
43
44
45
46
47
48
49
50
51
52
53
54
55
56
57
58
59
60
61
62
63
64
65
66
67
68
69
70
71
72
73
74
75
76
77
78
79
80
81
82
83
84
85
86
87
88
89
90
91
92
93
94
95
96
97
98
99
100
101
<template>
<div id="star-pic-vue">
<template v-if="data">
<img v-for="item in images"
:src="item"
id="contract_url"
@click="enlargePic"/>
<template v-if="isDialogShow">
</template>
<el-dialog
:visible.sync="centerDialogVisible"
modal
close-on-click-modal
custom-class="dialog"
>
<el-carousel :autoplay="false" arrow="always">
<el-carousel-item v-for="item in data" :key="item">
<img :src="item">
</el-carousel-item>
</el-carousel>
</el-dialog>
</template>
</div>
</template>
<script>
export default {
name: "star-pic-list",
props: ["data","maxShow"],
data(){
return{
centerDialogVisible: false,
showPic: '',
isDialogShow: false,
index: 0,
}
},
computed: {
images() {
if (this.data instanceof Array && this.data.length > 2) {
return this.data.splice(0,this.maxShow)
} else {
return this.data
}
}
},
methods: {
// 放大图片
enlargePic(e){
this.isDialogShow = true;
this.centerDialogVisible = true;
this.showPic = this.data[0];
console.log(this.images)
},
}
}
</script>
<style lang="less">
#star-pic-vue{
width: 200px;
height: auto;
display: flex;
flex-wrap: wrap;
img{
width: 80px;
height: 80px;
margin: 4px;
}
.dialog {
img{
width: 100%;
height: 100%;
margin: 0;
}
}
.el-carousel__item h3 {
color: #475669;
font-size: 18px;
opacity: 0.75;
line-height: 300px;
margin: 0;
height: 100%;
width: 100%;
}
.el-dialog__header{
display: none;
}
.el-dialog__body {
padding: 0 !important;
margin: 0 !important;
height: 600px;
}
.el-carousel{
height: 100%;
}
.el-carousel__container {
height: 100%;
}
}
</style>
更多组件点击这儿 --> link : github>components>star-pic-list
以上就是本文的全部内容,希望对大家的学习有所帮助,也希望大家多多支持脚本之家。
您可能感兴趣的文章:
Vue+elementUI实现多图片上传与回显功能(含回显后继续上传或删除)vue+elementUI实现图片上传功能vue+elementUi图片上传组件使用详解vue+elementUI实现表单和图片上传及验证功能示例使用elementUI实现将图片上传到本地的示例ElementUI修改实现更好用图片上传预览组件原文链接:https://segmentfault.com/a/1190000018712143
本文来自互联网用户投稿,该文观点仅代表作者本人,不代表本站立场。本站仅提供信息存储空间服务,不拥有所有权,不承担相关法律责任。
如若内容造成侵权/违法违规/事实不符,请将相关资料发送至 [email protected] 进行投诉反馈,一经查实,立即处理!
网址:基于elementUI实现图片预览组件的示例代码 https://m.mxgxt.com/news/view/1818732
相关内容
A星寻路算法详解(C++实现 完整代码+图片演示 )【Seer(文件预览软件) 】Seer(文件预览软件)
组件
CV之FR(H+k机器学习):基于每人几张人脸图片训练H+k模型实现(国内外明星)新人脸图像的姓名预测(准确度高达100%)
Adobe Photoshop CS2新功能完全预览(多图)
软件开发项目中关联图的运用:策略、实践与示例
js实现人物关系图
跟我学UML建模工具StarUML(第8部分)——应用StarUML创建组件图的创建示例
阿里巴巴申请图像自动生成前端代码专利,实现从图像到代码的精准转换
深入理解关系图谱:基于Relation
随便看看
最新实时动态
- 郭晓婷王天辰拆CP发言引热议
- 跟穷人谈钱跟有钱人谈感情,王漫妮事业爱情落得两头空
- 所有人感受顶级反差
- 朴智旻永舞一舞台表演引关注
- 真诚的热爱,从不会被时代辜负!
- 42岁张俪近况曝光!曾经历2段失败恋情,如今美貌依旧却还是单身
- 宝宝好漂亮 /cr.GLISTEN
- 雷修远自请放弃比赛,黎非成第一,雷修远被师父责骂
- BTS田柾国慕尼黑演唱会墨镜造型引热议
- 师傅被师兄杀 李莲花剧毒发作,誓死要杀师兄
热点实时动态
- 106953
- 25428
- 20022
- 19707
- 19473
- 19424
- 19163
- 18732
- 18690
- 18683